

Photography for Woodworkers
Quick Answer: How do woodworkers take better photos?
Woodworkers get better photos by controlling light — raking light to reveal grain, diffused light to soften a room, backlight to carve a silhouette, and single‑point light to show texture. Good woodworking photography isn’t about the camera; it’s about how light falls on the craft.
Raking light — reveals grain
Diffused light — softens surfaces
Backlight — creates silhouette
Single‑point light — shows texture
Controlled flash — shapes highlights
Natural shop light — honest, simple, effective
How Light Turns Woodworking Into Photography
Woodworkers search constantly for ways to photograph their work — how to light a project, how to make grain show up, how to take a shop photo that actually looks like the piece they built. This Ramble shows exactly that: real tools, real furniture, real shop light, and real technique.
BY THE END OF THIS STORY
You’ll understand how light shapes woodworking photography — how raking light reveals grain, how diffused light softens a room, how backlight carves a silhouette, and how simple shop lighting can turn a tool or table into a photograph that actually shows the craft.
Read time: 4 minutes
Comparison — Light Types for Woodworking Photography
Raking light — reveals grain and texture
Diffused light — soft, even, forgiving
Backlight — silhouette + contour
Flash — controlled highlights
Ambient shop light — honest but flat
Quick Summary
Woodworking photography isn’t about the camera — it’s about the light. Raking light reveals grain, diffused light softens a room, backlight carves a silhouette, and single‑point light brings texture alive. Once you learn how light falls across wood, tools, and finishes, your photos start showing the craft you actually built — honest, intentional, and shaped by the same attention you give your joinery.
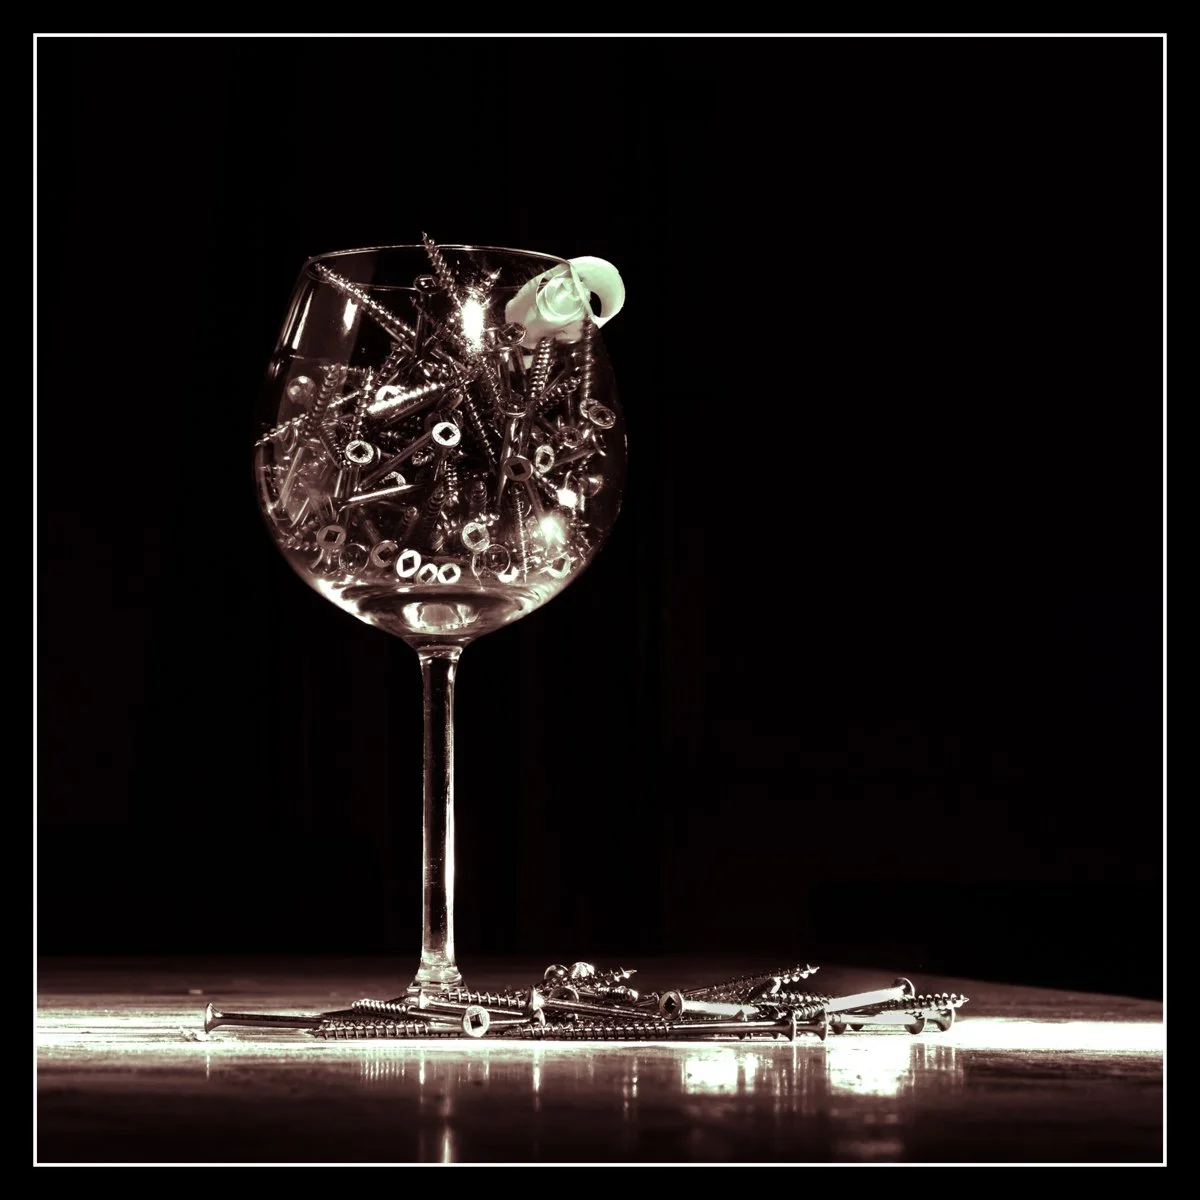
Gloss Texture Study — Wood Screws in a Wine Glass
A wine glass filled with wood screws photographed on a glossy surface using two remote flashes — one overhead to define the reflective highlights, and one as a soft side fill to catch the edge of the glass. The controlled lighting reveals the gloss texture, the metallic surfaces, and the contrast between the delicate glass form and the rugged hardware inside. A single ribbon curl from a hand plane clings to the rim — the only matte element in the scene — adding a quiet, organic counterpoint to the shine.
Every woodworker eventually learns this truth:
Building something beautiful is only half the job — the other half is showing it.
That’s where photography comes in, and it’s where so many of us feel that sting of disappointment.
Have you ever built something you’re proud of — the smooth surface broken by a clean profiled edge, a perfect joint meeting another board, a satin finish glowing just right — and then you take a photo and it looks… flat?
You show someone the picture, and they see a table on a phone screen.
You see the hours, the craft, the vision.
They don’t.
That gap between what you built and what the photo shows is what this Ramble is about.
The Thesis: It’s not the camera — it’s the light
I’m an avid photographer. I enjoy photography as much as writing, as much as woodworking. But I’m a woodworker first. I write about woodworking, I photograph woodworking, and to me a photograph is as much craft as a dovetail or a story. They’re all connected.
And just like in woodworking, the tool doesn’t make the work.
It’s not the camera.
It’s not the lens.
It’s not the megapixels.
It’s the light.
Nothing kills a photo faster than the flat glow of a fluorescent shop lamp.
If you look through the photos on my website, you’ll see some that climb off the screen and others that are just… photos. The difference is always the same: how the light falls.
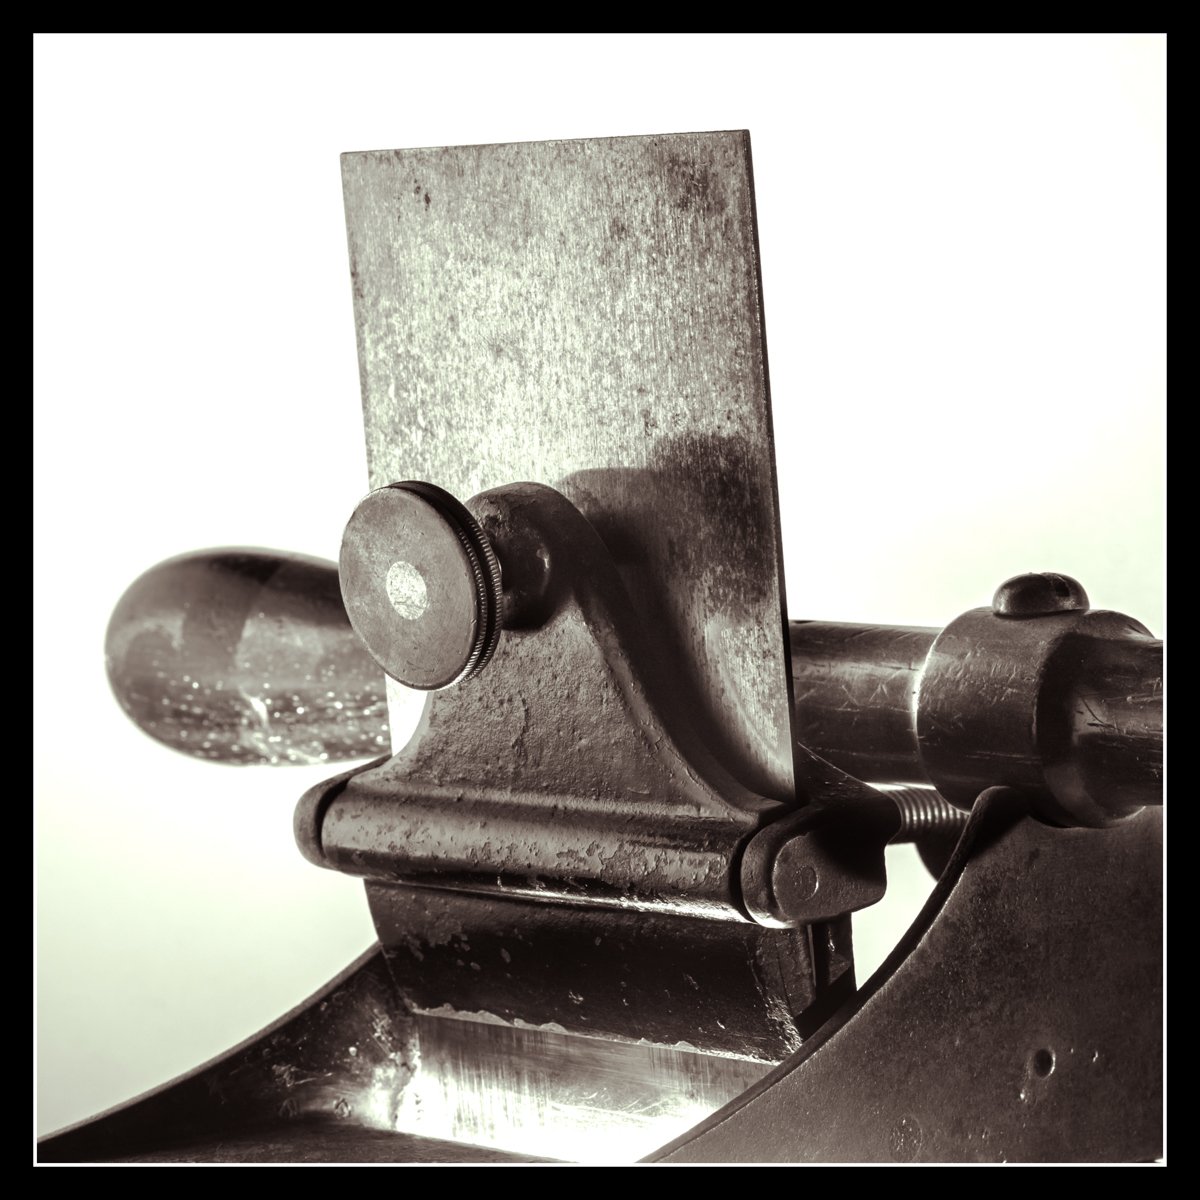
Scraper Plane in Directional Light — Photography for Woodworkers
An old scraper plane photographed with a remote flash from the side to reveal the metal texture and patina, and a second flash firing up through the mouth of the plane to highlight the lower edge of the blade. The controlled lighting brings out the wear, the contours, and the working surfaces that flat shop light would hide — a perfect example of how directional light turns a simple tool photo into a study of craft.
Why Shop Photos Fail
Most woodworkers run into the same problems:
flat fluorescent light that erases texture
no shadows to reveal grain
busy backgrounds that distract from the build
light coming from the wrong angle
cell phone auto‑exposure fighting the scene
You’re not doing anything wrong — you’re just using task lighting for something it was never meant to do.
A fluorescent tube illuminates.
A single‑point light source reveals.
Understanding Light (the woodworker’s version)
If you’ve ever searched for how to do photography for woodworkers, this is the part most people miss: the light. Think of light the same way you think of a hand plane:
the angle, the direction, and the pressure change everything.
A flashlight creates shadows.
A fluorescent tube erases them.
Shadows are what make a photo breathe — the tiny dark lines that show the texture of a rough‑sawn board, the raking highlight across a chamfer, the soft falloff on a satin finish.
My best photos use single‑point light: a flash, a lamp, even an incandescent bulb.
I’ll take dozens of shots, moving the light, bouncing it off a white melamine cutoff, filling the shadow side with a second flash. It’s all just experimenting with how the light skims the surface.
If you rake the light low — like a sunset skimming the earth — magic happens.
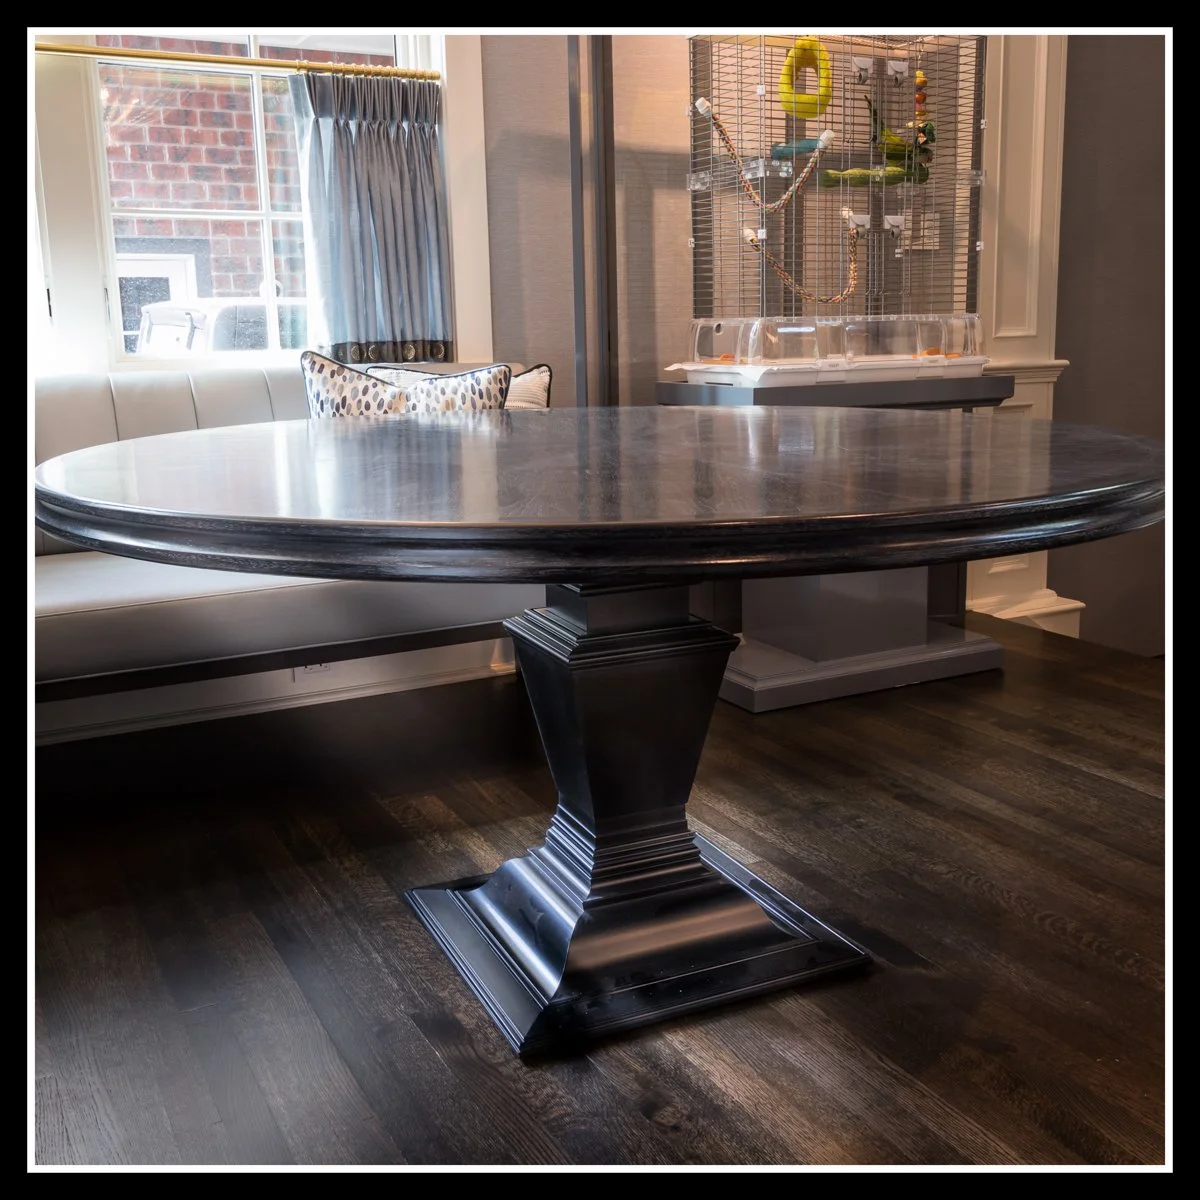
Walnut Table in Natural Diffused Light — Photography for Woodworkers
A custom walnut table photographed using only the diffused sunlight coming through the windows. The soft natural light creates a sleek sheen across the top and pedestal — revealing every curve, every surface, and even the dust you didn’t notice until the camera showed it. Walnut’s deep tone and reflective finish respond beautifully to ambient window light, turning a simple dining nook into a quiet study of wood, light, and craft.
A Simple Way to Start
This isn’t a photography course. There are entire worlds dedicated to that.
But if you’re a woodworker trying to take better photos of your builds, start here:
use one light source
rake it low across the surface
take lots of photos
delete freely
Grab a dusty rough‑cut board, clamp it upright, different angles and play with a flashlight.
Watch how the grain changes.
Watch how the shadows deepen.
Watch how the board comes alive.
That’s photography for woodworkers.
Closing Reflection
A good photo doesn’t make your work better — it just lets people see what you already built. Good woodworking photography helps people see the craft the way you see it.
Light is just another tool.
Use it well, and your craft will speak for itself.
Entrance to the Gallery
Light is the most honest critic a woodworker will ever meet. It doesn’t care how long a build took, how proud you are of a joint, or how many times you sanded a surface — it simply shows what’s there. Good light reveals the craft. Bad light hides it. And the camera, unforgiving as it is, will always tell the truth.
This gallery isn’t about perfect staging or studio gear. It’s about the kind of light any woodworker can use: a single flash, a doorway, a window, a bounce off the floor, a shadow that happens to fall the right way. Every photo here started as a simple object in a shop — a tool, a table, a handful of screws — and became something more only because the light was right.
These images aren’t meant to impress. They’re meant to teach. They show how raking light brings grain alive, how backlight carves a silhouette, how diffused sunlight softens a room, and how shadows give shape to the things we build. They’re small demonstrations of a simple truth: photography for woodworkers isn’t about cameras. It’s about learning how to see.
Step into the gallery, and watch how the craft changes when the light does.
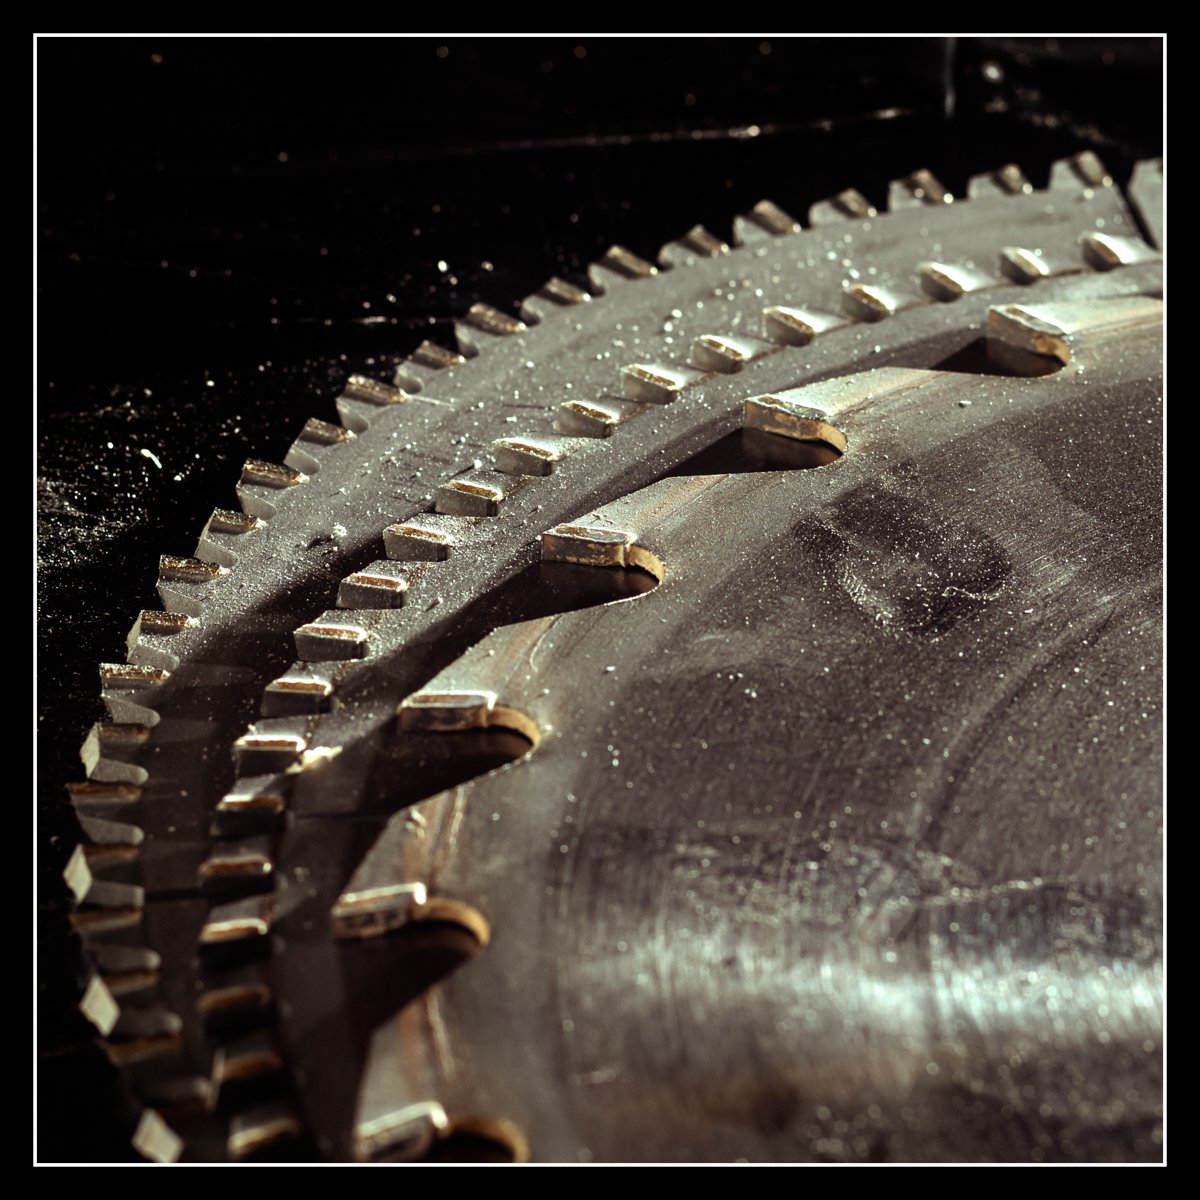
Raking Light on Saw Blades — Photography for Woodworkers
A few saw blades photographed under low, single‑point raking light to reveal the fine tooth pattern, metallic texture, and workshop wear. The controlled flash and black background isolate the blades, letting the shadows define the shape and the highlights skim across the steel — a perfect example of how directional light brings woodworking tools to life.
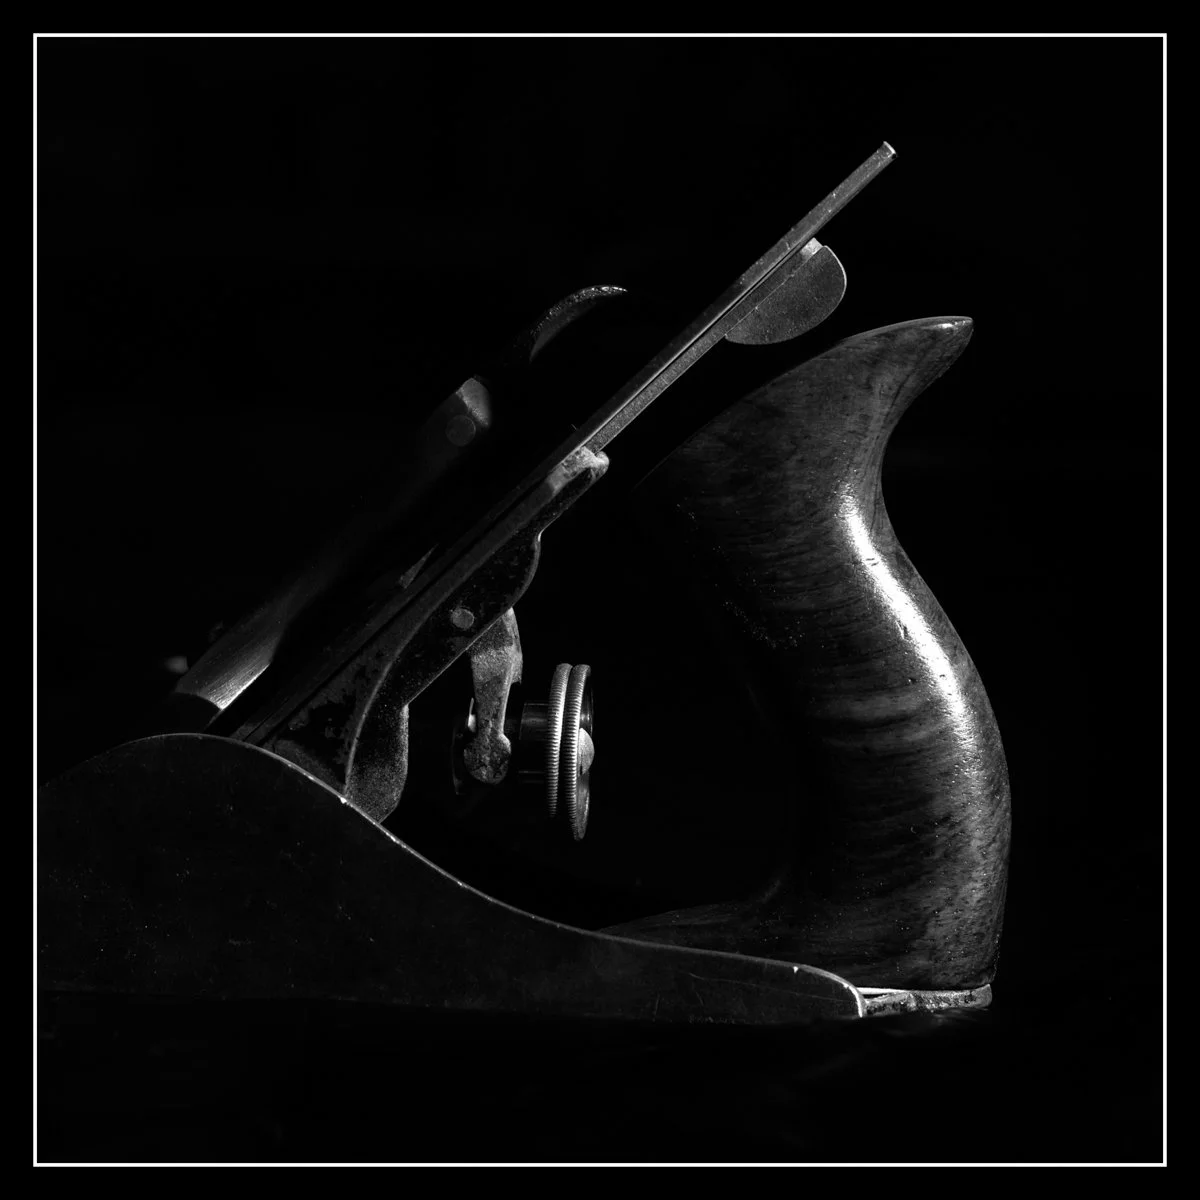
Raking Backlight on Hand Plane — Photography for Woodworkers
A hand plane photographed on a black background with a single detached flash placed behind the tool, creating a subtle rim of light along the edges. The backlight reveals the contours of the tote, the metal body, and the fine workshop wear, turning a simple silhouette into a study of shape, craft, and texture. This is the essence of woodworking photography — directional light doing the work a camera can’t do by itself.
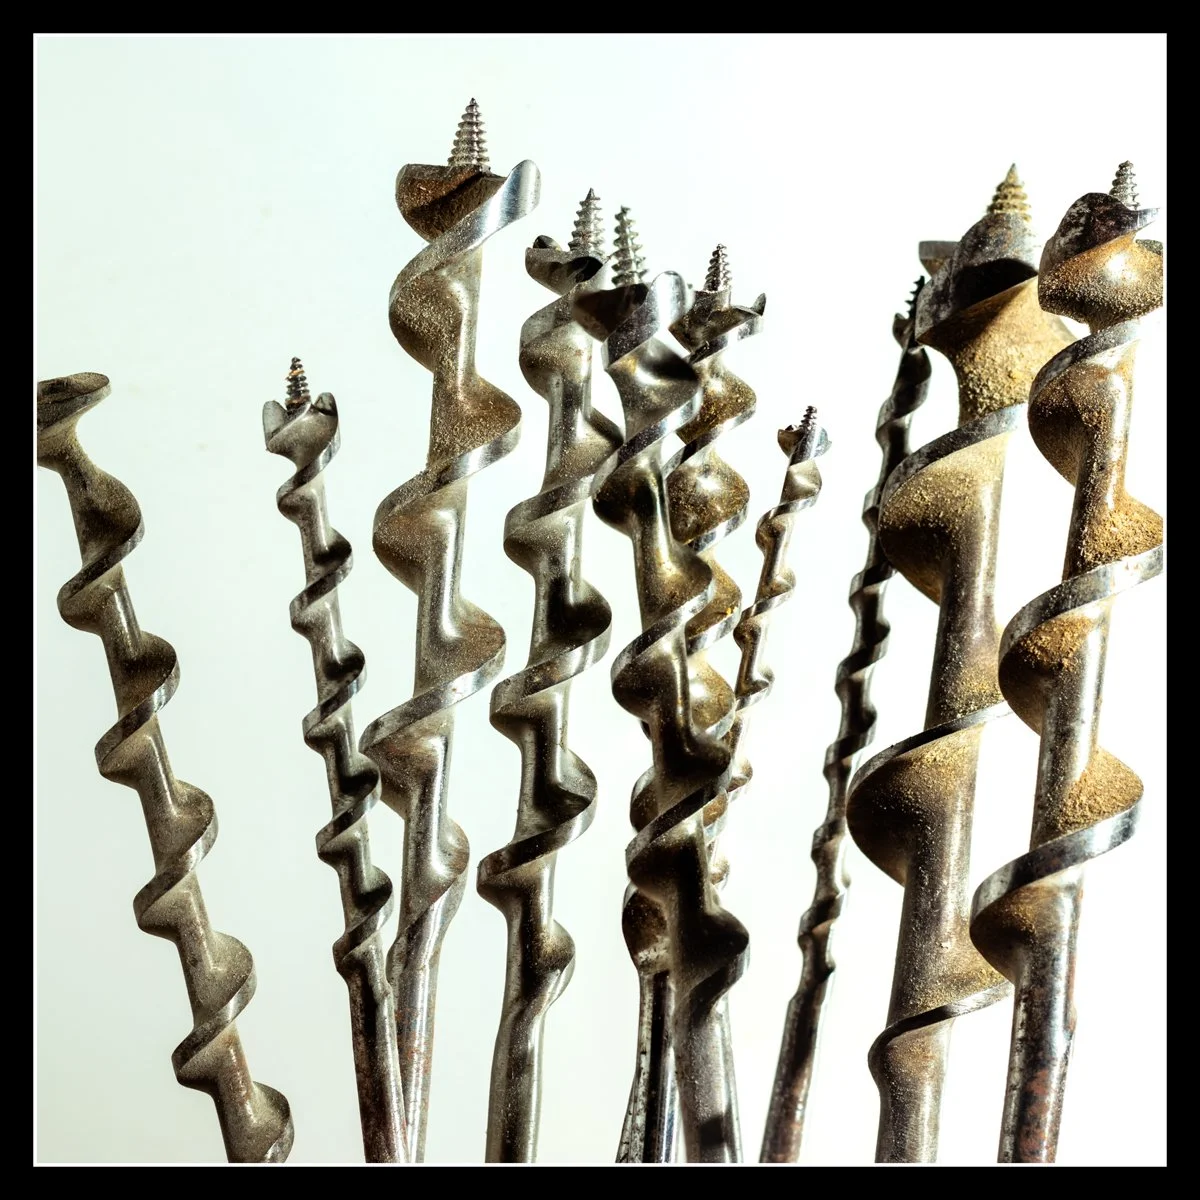
Auger Bits in Controlled Light — Photography for Woodworkers
A grouping of auger bits photographed against a crisp white melamine background using two remote flashes — one as a side light to reveal the spiral texture and dust clinging to the steel, and one as a backlight to lift the background into clean white. The controlled lighting isolates each bit, showing the geometry, wear, and craftsmanship that flat shop lighting would normally erase.
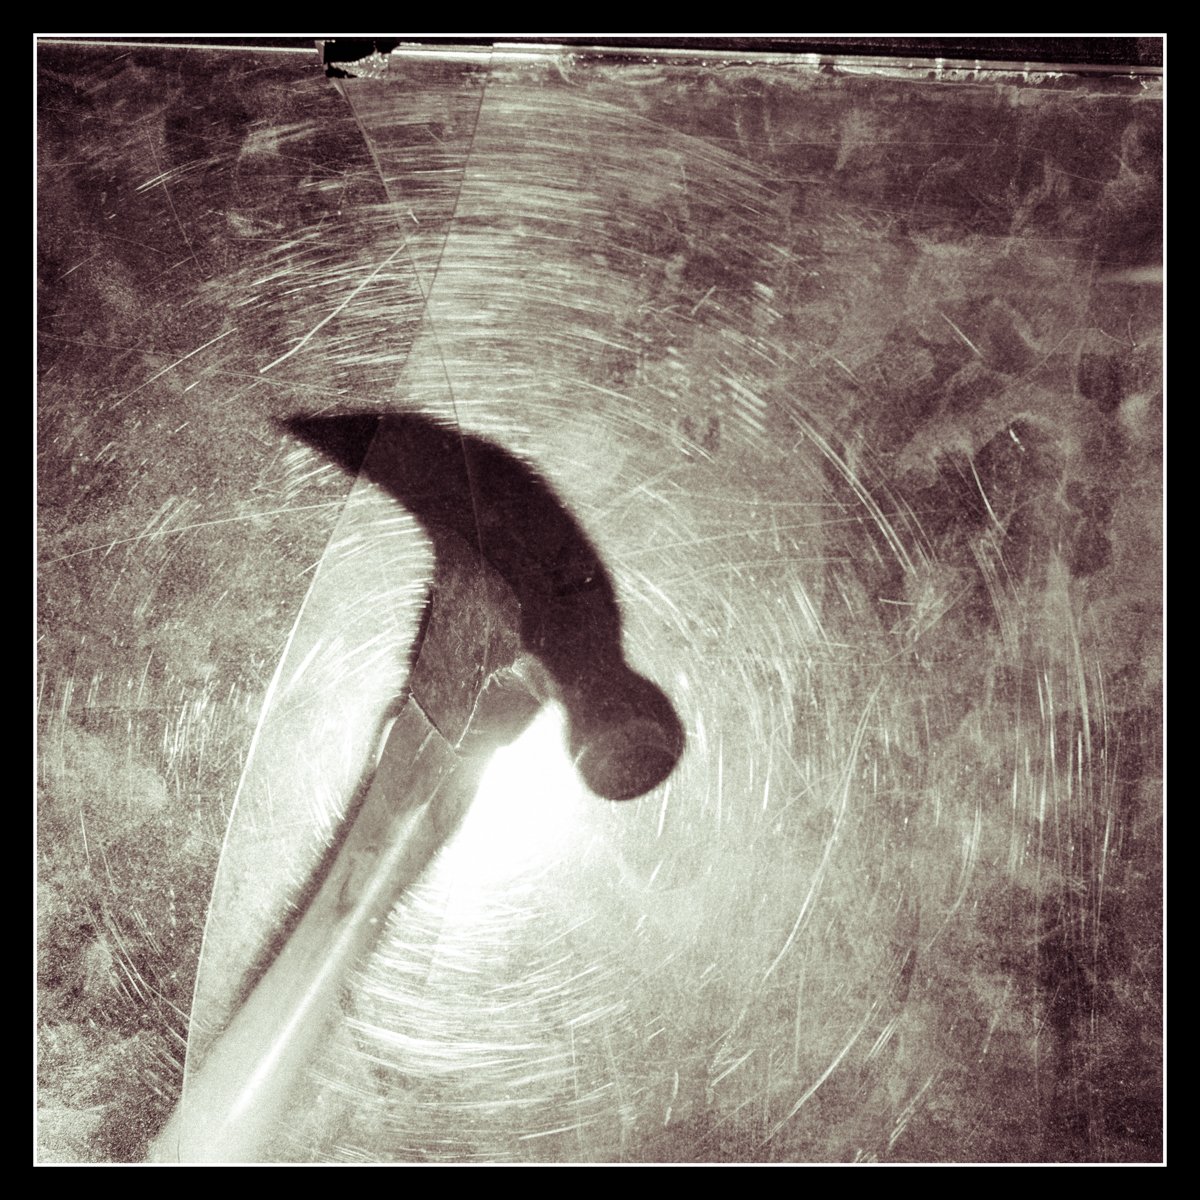
Hammer Silhouette Through Scratched Plexi — Photography for Woodworkers
A hammer photographed behind a scratched, chipped piece of plexi used as a textured filter. A remote flash placed directly behind the hammer fires straight toward the lens, lighting every scratch, chip, and speck of dust in the plexi while leaving the hammer in silhouette. A second flash from below adds just enough fill to reveal the faint wood grain and metallic texture of the tool. The silhouette works because the texture works — a perfect example of how directional light can turn a simple shop tool into an atmospheric study of craft.
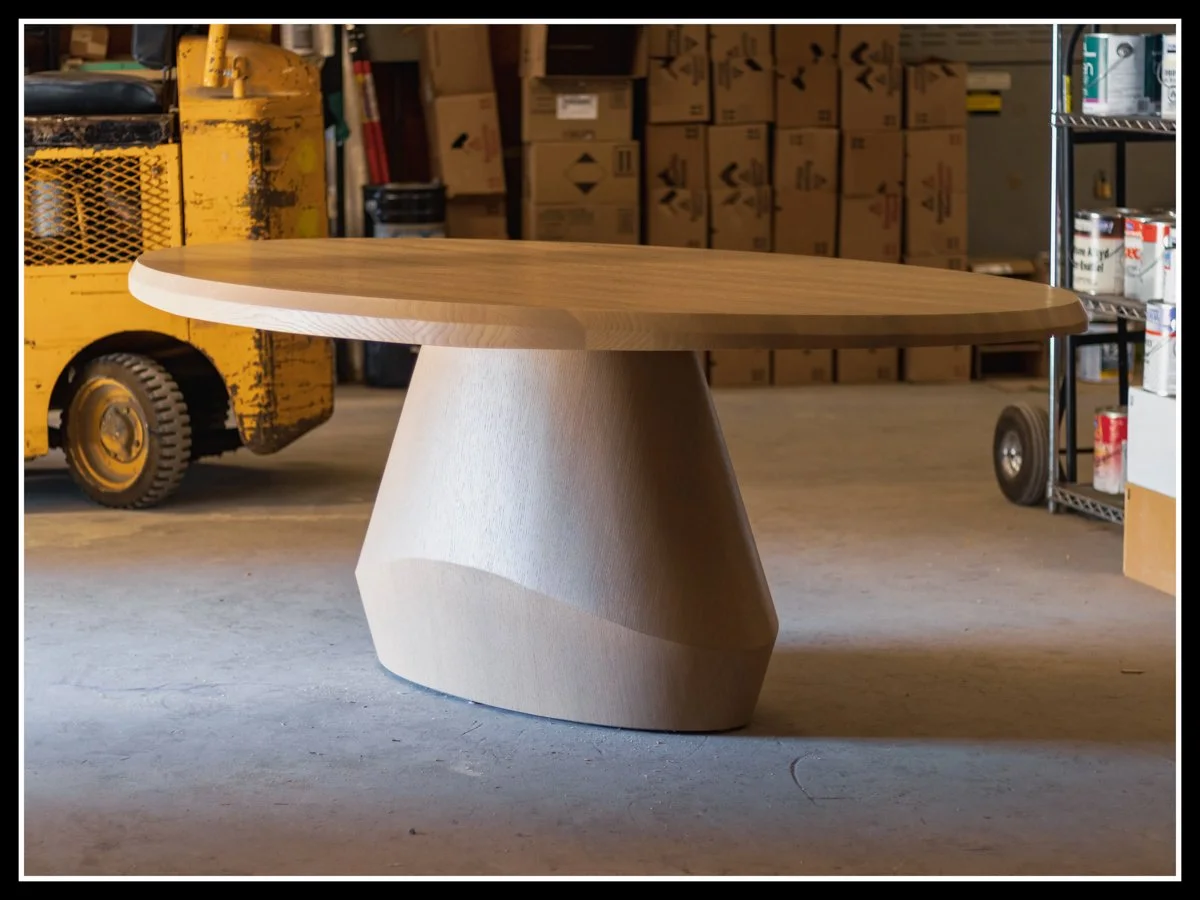
Red Oak Table in Diffused Shop Light — Photography for Woodworkers
A custom red oak table photographed in diffused shop light from an open overhead door. The midday sun doesn’t strike the table directly — instead it bounces off the floor and fills the room with a soft, even glow that shapes the pedestal and rounds of the top. The forklift in the background adds industrial ambiance, contrasting the elegance of the table with the working environment it was built in. This is the kind of natural, directional light woodworkers can use every day — simple, honest, and revealing.
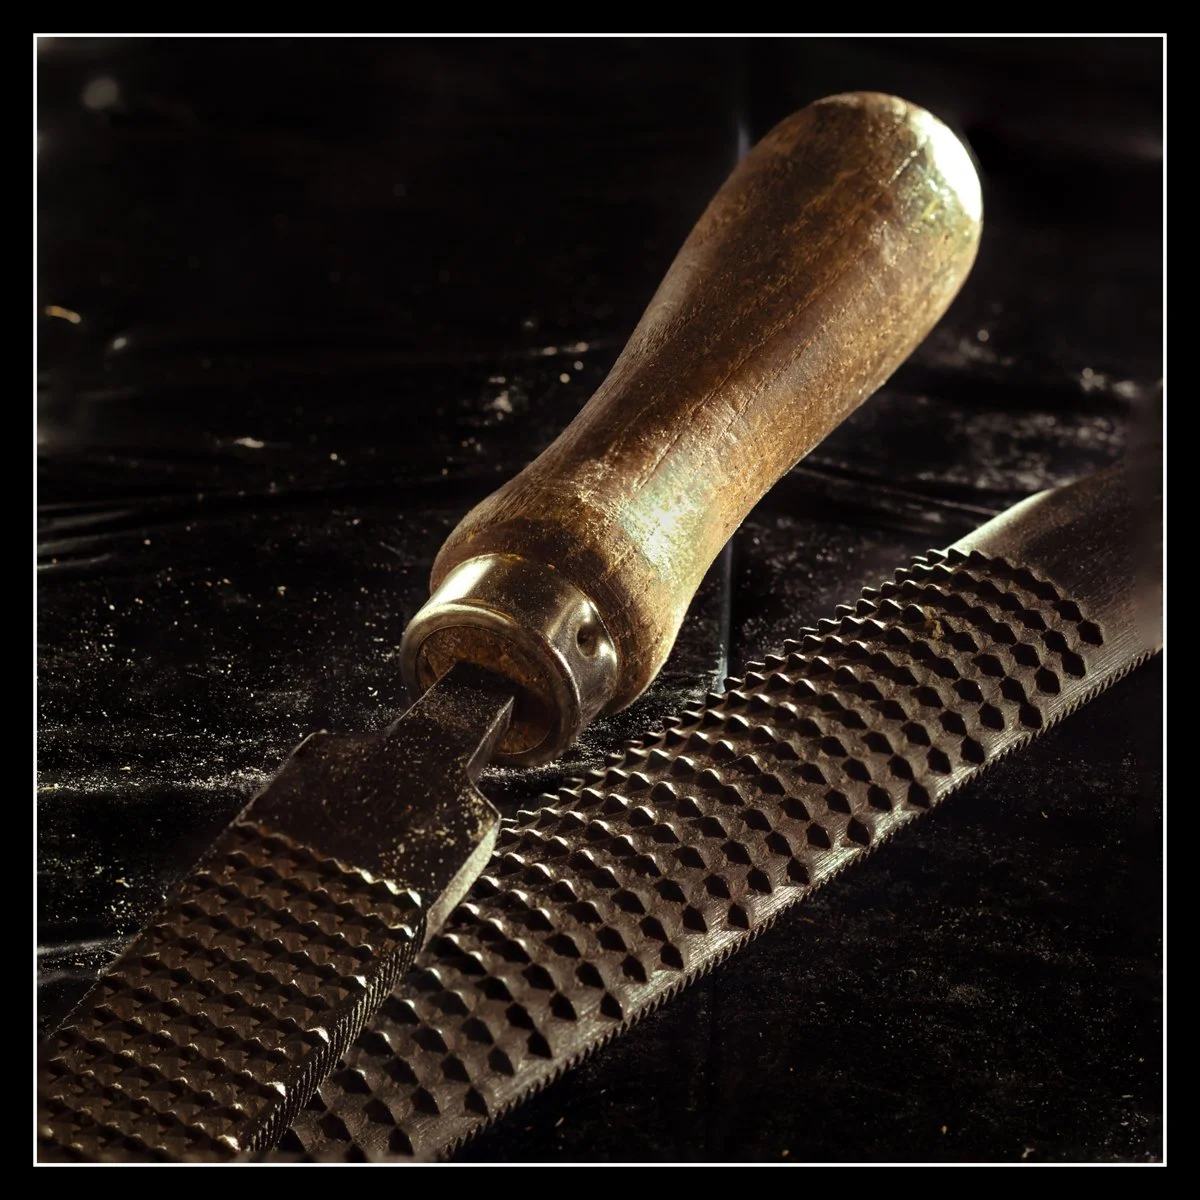
Rasps in Directional Light — Photography for Woodworkers
A pair of rasps photographed against a black background — just a garbage bag used to eliminate visual noise. One remote flash from the back‑right reveals the sharp, raised teeth and metallic texture, while a second gentle fill from the left lifts the wood handle and softens the shadow side. The controlled lighting turns a simple hand tool into a study of texture, showing how light and shadow bring woodworking surfaces to life.
Comparison Note for the Two Nightstand Photos
These two photos below are the same nightstand on the same bench with the same black blanket — the only difference is the light and the technique. One is the formal shot, taken with two remote flashes and a lot of trial and error until the shadows and highlights landed just right. The other is the casual shot, just diffused sunlight from an open door and a shallow depth of field to soften the background. I kept both because they each work in their own way. When I’m in the shop and have time, I take a lot of shots until I get it right, especially when flashes are involved. It’s fun, and it’s part of the craft. Different light, different feel — but the nightstand looks great in both.
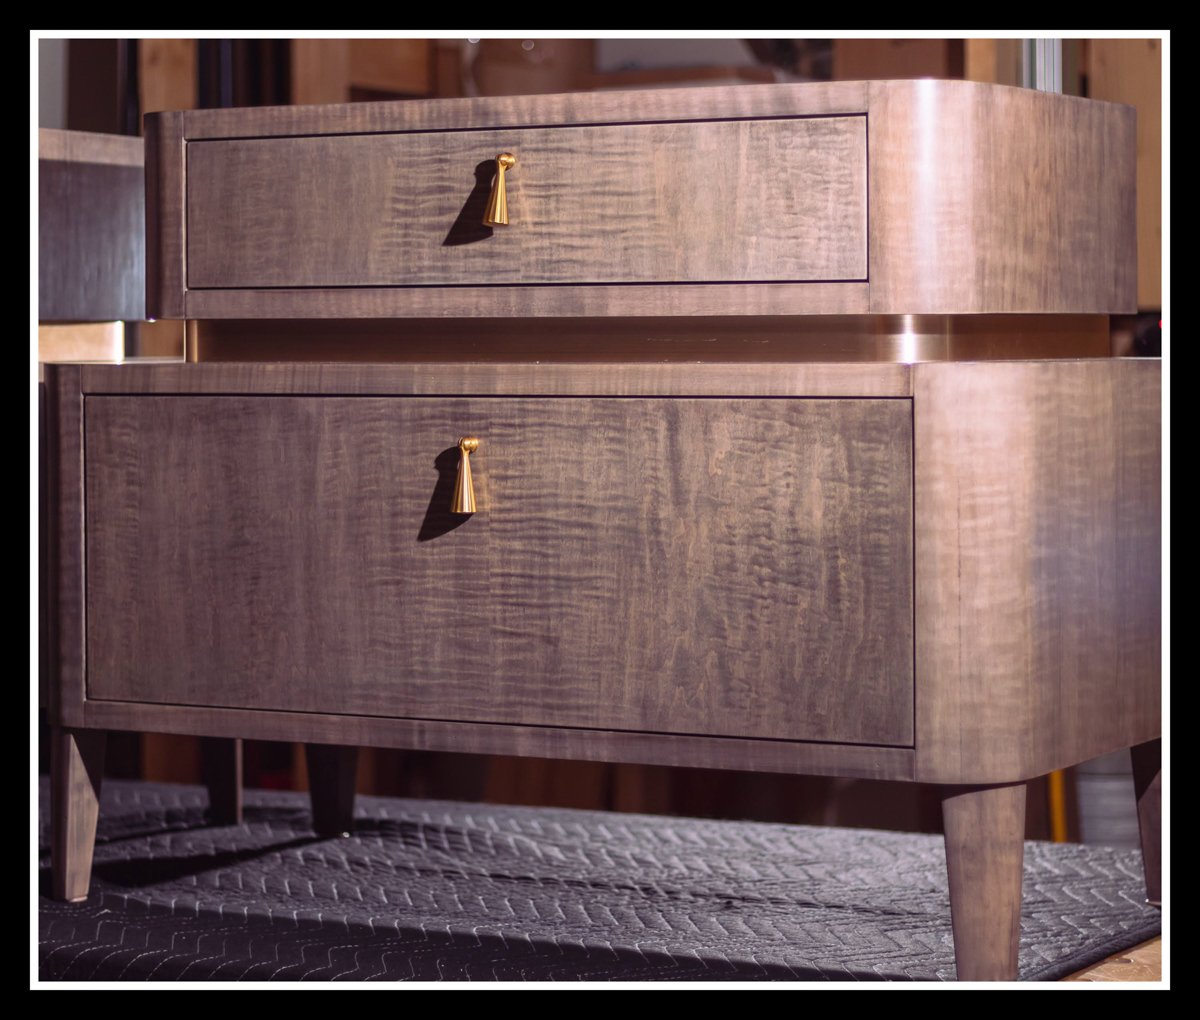
Nightstand in Controlled Light — Photography for Woodworkers
A handcrafted nightstand photographed on a black shipping blanket to remove visual competition from the workbench. A single remote flash from the side shapes the shadows, while a second subtle backlight lifts the outline of the piece and makes it pop against the dark ground. The controlled lighting reveals the grain, the curves, and the brass pulls, showing how directional light can turn a simple shop photo into a true representation of the craft.
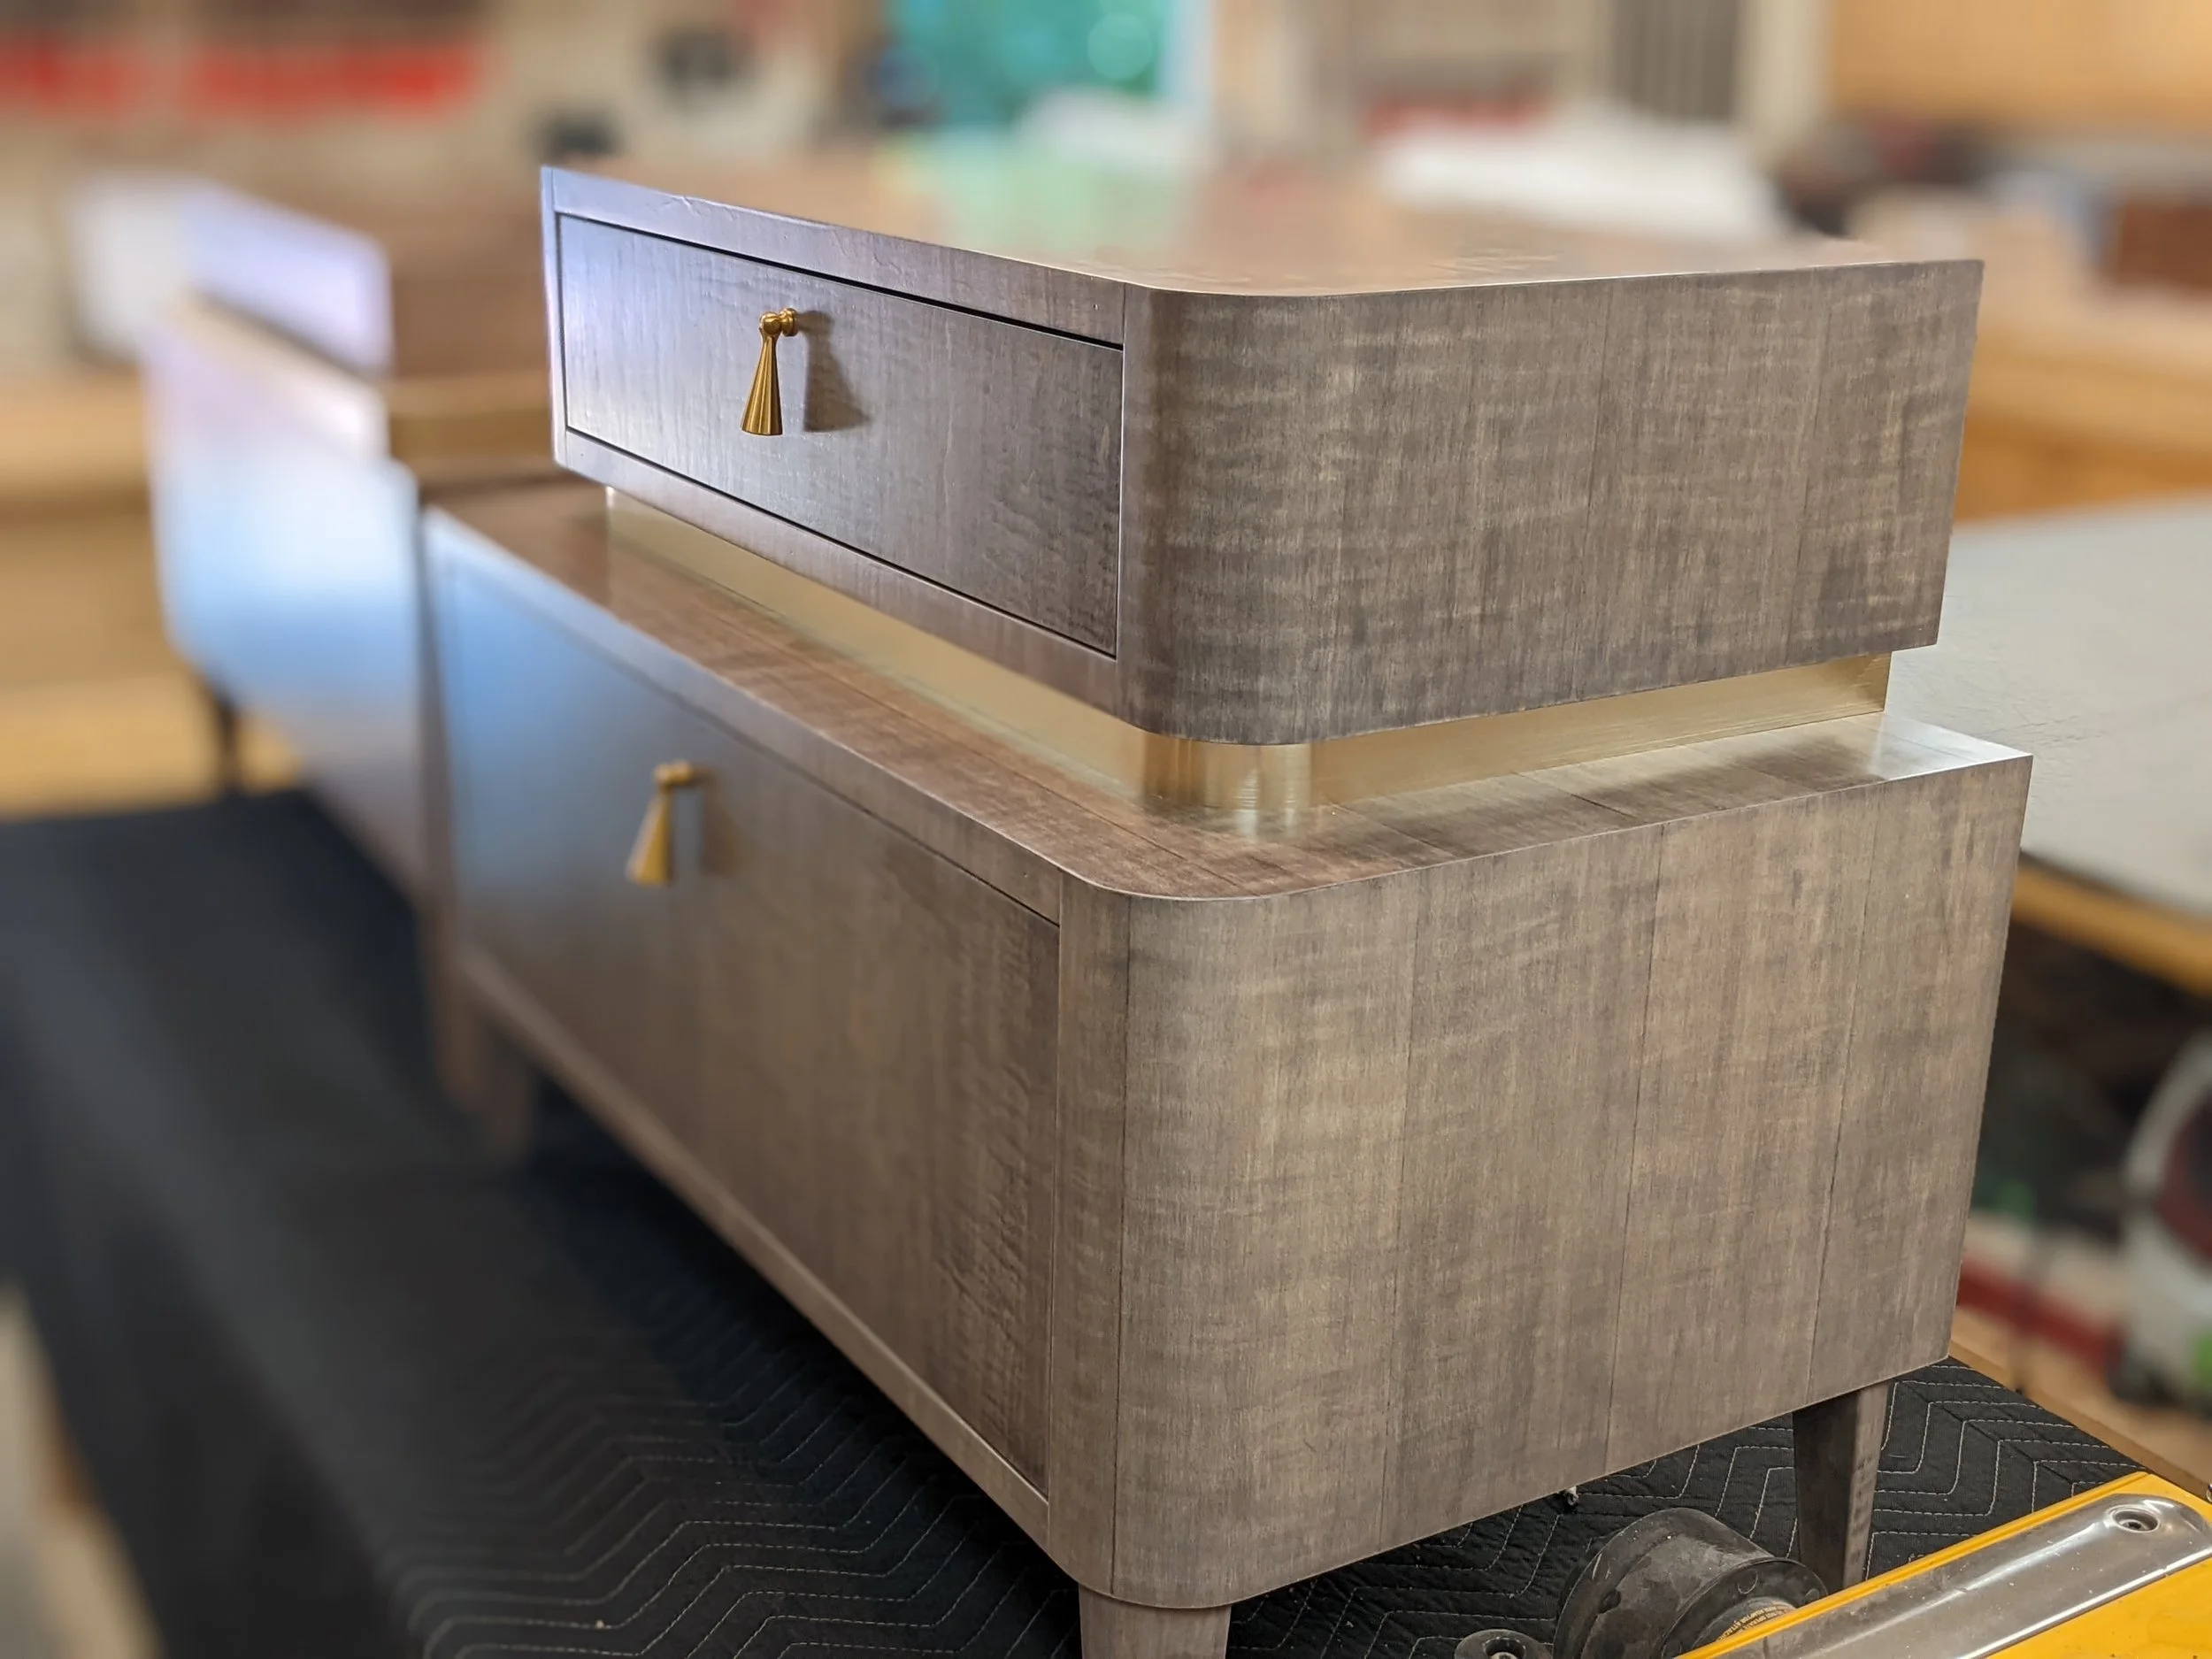
Nightstand in Natural Diffused Light — Photography for Woodworkers
A handcrafted nightstand photographed with nothing but diffused sunlight flooding in through an open door. The soft natural light shapes the curves, grain, and brass pulls while the shallow depth of field creates a gentle background blur that isolates the piece from the shop. The black blanket removes visual competition, letting the nightstand stand alone in the frame. Natural light reveals everything — the warmth of the wood, the softness of the shadows, and the quiet honesty of the craft.
📷 About the Gear
All these photos were taken with whatever camera I had at the time — a DSLR with whatever lens was on it, sometimes my old Canon T5, sometimes the 80D I use now. I don’t remember which shot used which lens, and it doesn’t matter. I use a couple of remote flashes when I need them, and they’re temperamental things that demand patience. Across the rest of my website you’ll see photos from a Pixel 5, an old BlackBerry, an iPhone 4s, and even a few on film. The focus should always be on light and technique. Just like woodworking, it’s not the tool — it’s the person using it. Better equipment can make the job faster, but the technique comes first.
Digital to Sawdust — Design Studio
Digital tools, layout, and proportion — the design side of woodworking before the sawdust begins.
SHARE
Digital to Sawdust — Design Studio
Lessons in woodworking design, geometry, and digital layout — teaching how furniture is shaped with intention.— head to the Design Studio. Just one click away.
If you’d like to hear from me only when something big is happening — a launch, a milestone, or a major project — you can join the mailing list below.
Written by David Flather, Red Seal cabinetmaker and founder of Knotty Dave’s Fine Woodworking — a Manitoba shop rooted in heritage restoration, storytelling, and real craft.
All photos shot by David Flather — in the shop, on the road, and in the places where craft and story meet.
Related Stories:
Woodworking Design: Getting It Right: The 60/40 Rule for Better Design Balance
Visual Weight in Woodworking: How Proportion Shapes the Feel of Furniture
The Quiet Geometry of Furniture: How Curves Change a Room, Softening Rectangular Design
The Workshop Library
If you enjoyed this story, there’s lots more like it inside The Workshop Library — and it’s free to explore.
Wood Archive — species, grain, working properties, and real‑world craft notes
Behind the Grain — the deeper stories inside wood, craft, and heritage
The Working Side of the Craft — tools, shop life, workflow, and the realities of making
Digital to Sawdust — Design Studio — geometry, proportion, visual flow, and design thinking
The Stories of the Shop — the personal side of craft, the shop’s history, and the quiet moments that shape the work
House & Hearth — heritage home restoration, the hearth room, winter culture, and the lived‑in side of craft
I’m just one man with a shop, building this archive one story at a time. If you’d like to follow the journey as it unfolds, explore The Workshop Library — new stories every week.
