

The Belt Sander Mistake Every Woodworker Makes
Why do belt sanders dig when you don’t keep them flat?
A belt sander is a shaping tool, not a finishing tool. The moment you add pressure, tilt the machine, or stop moving, the platen stops riding flat and the rollers start digging. That’s why beginners gouge edges, leave dips, and ruin panels. Professionals let the sander’s natural weight do the work, keep it moving constantly, and use it only for fast shaping, not final surface prep.
Keep the tool moving — the platen only stays flat when the machine is in motion
Use the sander’s natural weight — pressure turns shaping into gouging
Stay perfectly level — even a slight tilt digs instantly
Know when to use it — sheet goods, scribing, leveling edges, laminate prep
Avoid using it for finishing — it’s not a refinement tool
Watch the cord — stepping on it tilts the machine and gouges the work
Choose the right belt width — 4" belts stay flatter and feel more stable
Respect the tool — it does exactly what you tell it to do, fast
Why Belt Sanders Ruin Good Work When Used Wrong
A belt sander is the loud, impatient worker in the shop — the one you call when something needs to change right now. It’s not elegant, it’s not refined, and it’s definitely not a finishing tool. It’s a shaping machine, a problem‑solver, and a troublemaker all at once. Every cabinet shop keeps one at arm’s reach because it can save a project in seconds… or destroy it even faster.
By the end of this story
You’ll understand the single technique mistake that turns a belt sander from a problem‑solver into a project‑killer — and how to avoid it every time.
Estimated read time: 4 minutes
Fast Summary
A belt sander removes material aggressively and unevenly, and any tilt or pressure turns it into a gouging machine. This story explains how belt sanders actually work — rollers, platen, weight, and motion — and why they’re meant for shaping sheet goods, scribing, and fast leveling, not finishing. You’ll learn the single technique that prevents damage (keep it moving), the cord trick every installer uses, and why pros treat belt sanders with respect: they solve problems fast, but they create bigger ones even faster if used wrong.
The Belt Sander: Fast, Loud, and Always Hungry
A belt sander is a blue‑collar grunt tool.
It isn’t elegant
It isn’t precise
It isn’t refined
It isn’t “beautiful geometry”
It solves problems and creates them
It’s the loud, impatient worker in the shop — the one you call when something needs to change fast.
A belt sander is the tool you reach for when something needs to be shaped fast. It’s the shop’s speed demon — the tool that can save a project or destroy it in seconds.
You use it to scribe a countertop against a wall that isn’t straight. You use it to rough up melamine so contact cement actually has something to bite into. You use it to level a lipped MDF panel after you’ve glued on ¼" hardwood edging.
Every cabinet shop has one at every bench. Every installer carries one. It’s always nearby because it’s always in a hurry.
But here’s the part beginners never understand:
A belt sander is a shaping tool, not a finishing tool.
Treat it like a finishing sander and it will dig holes, gouge edges, leave dips, and create problems that only show up when the finish goes on. It’s useful, but risky — like using a chainsaw for joinery. The tool does exactly what you tell it to do, and it does it fast, whether you meant it or not.
How a Belt Sander Actually Works
The machine rides on two wheels — a front roller and a back roller — with a platen between them. The platen is the “flat spot,” but it’s only flat if you let the tool’s natural weight do the work. Add pressure and you’re no longer sanding: you’re digging.
This is why belt sanders come out a lot for sheet goods, less for solid cherry or maple furniture. They level and scuff fast while keeping edges sharp — exactly what you need when you’re prepping for veneer or plastic laminate.
You can clamp a belt sander upside down in a vise to sand small parts. Its handy, but In twenty years, I’ve done it once. It’s possible, but it’s not the belt sander’s real job.
Technique: The Only Rule That Matters
Keep moving. That’s the whole trick.
A 3" belt sander is twitchy and harder to keep level. A 4" belt gives you more platen face, more stability, and a better “feel” for flatness. None of this matters when you’re scribing a toe kick — then it’s all about control and speed.
The Cord Problem Nobody Talks About
Every belt sander user eventually steps on the cord.
You’re leveling a panel, the cord is dragging on the floor, you move forward, the cord goes tight, the sander tilts back, and suddenly you’ve gouged the work. It happens fast.
I once got the cord tangled in the belt track — couldn’t fix it, had to send it out for repair, and it wasn’t even my sander. That makes it worse.
In school they taught us the trick: throw the cord over your shoulder. It works. Keep the cord behind you and not under your feet.
Bottom Line
A belt sander is aggressive and unforgiving. It’s a shaping tool — not a finishing tool. Use it with respect, keep it moving, and let its weight do the work.
The Real Lesson
A belt sander isn’t a subtle tool. It’s fast, loud, and unforgiving. But in the hands of someone who respects what it is — a shaping tool, not a finishing tool — it becomes one of the most reliable problem solvers in the shop. It fixes crooked walls, cleans up edges, preps panels for laminate, and saves time every single day. The trick is simple: let the sander do the work, keep it moving, and never ask it to be something it isn’t.
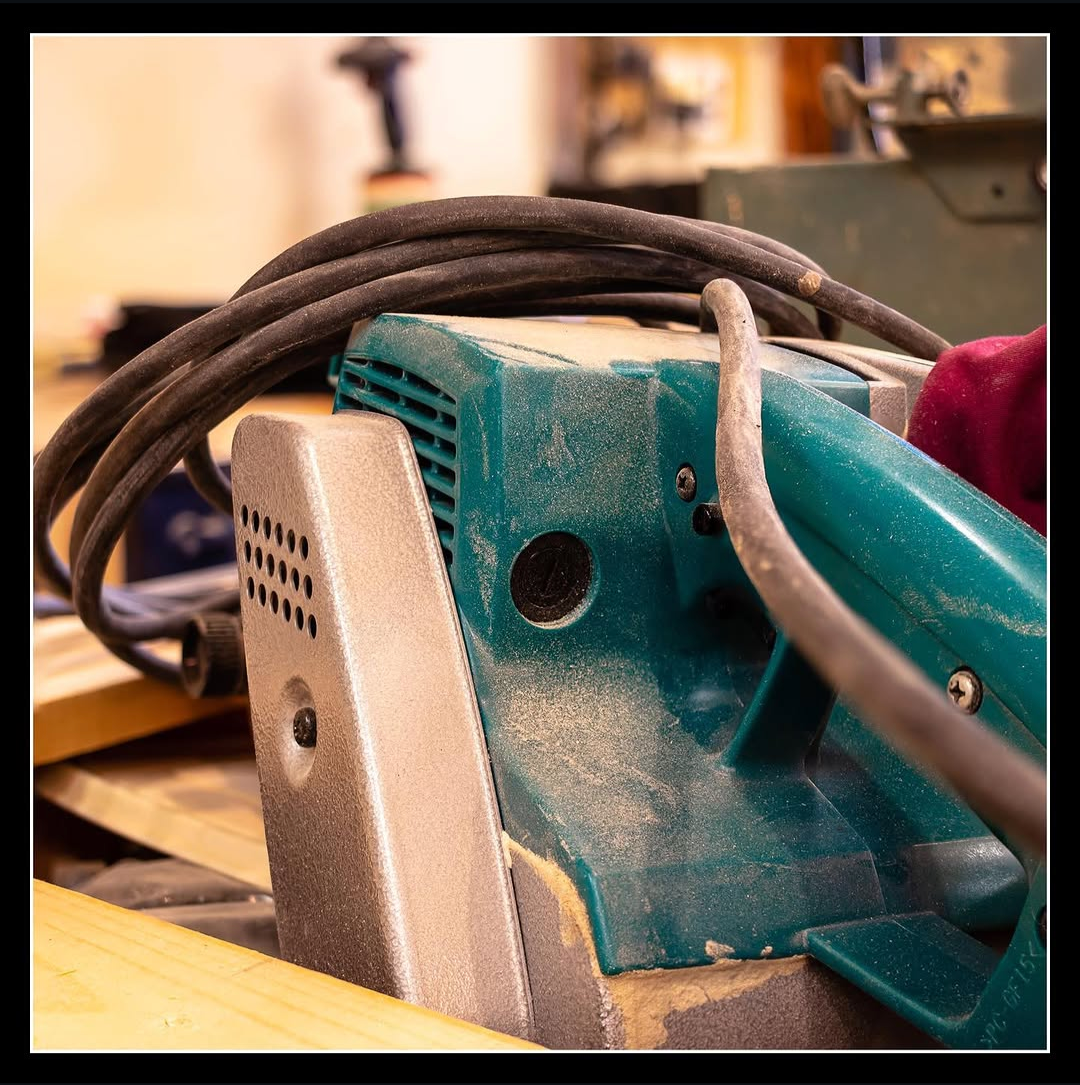
Makita 4-Inch Belt Sander for Fast Shaping and Heavy Stock Removal
A close-up look at the Makita 4-inch belt sander — a powerful shaping tool built for fast stock removal, scribing, and aggressive leveling in cabinetmaking and woodworking.
Together, gathered in one place so the machine stories, tool reflections, and workflow moments stay connected — easy to find and easy to return to.
SHARE
The Working Side of the Craft — Connected Through Machines, Tools & Stories
If you want the stories shaped by table saws, bandsaws, grinders, fences, and jigs — the honest, noisy side of woodworking — the Working Side Of The Craft is one click away.
If you’d like to hear from me only when something big is happening — a launch, a milestone, or a major project — you can join the mailing list below.
Written by David Flather, Red Seal cabinetmaker and founder of Knotty Dave’s Fine Woodworking — a Manitoba shop rooted in heritage restoration, storytelling, and real craft.
All photos shot by David Flather — in the shop, on the road, and in the places where craft and story meet.
Related stories:
Oscillating Belt Sander Review — The Small‑Shop Workhorse Every Woodworker Eventually Needs
Orbital Sanders: Why They Leave Waves & How Pros Keep Surfaces Flat
Finishing Sanders vs Orbitals: The Mistake Almost Every Beginner Makes
The Workshop Library
If you enjoyed this story, there’s lots more like it inside The Workshop Library — and it’s free to explore.
Wood Archive — species, grain, working properties, and real‑world craft notes
Behind the Grain — the deeper stories inside wood, craft, and heritage
The Working Side of the Craft — tools, shop life, workflow, and the realities of making
Digital to Sawdust — Design Studio — geometry, proportion, visual flow, and design thinking
The Stories of the Shop — the personal side of craft, the shop’s history, and the quiet moments that shape the work
House & Hearth — heritage home restoration, the hearth room, winter culture, and the lived‑in side of craft
I’m just one man with a shop, building this archive one story at a time. If you’d like to follow the journey as it unfolds, explore The Workshop Library — new stories every week.
