

The Finishing Sander Mistake Everyone Makes
Quick Answer: What’s the finishing sander mistake everyone makes?
Most beginners buy a finishing sander thinking it’s the main sanding tool, but it isn’t. A finishing sander is a specialty machine that leaves visible scratch patterns and struggles with real surface prep. The orbital sander does 95% of the work — faster cutting, cleaner surfaces, and fewer mistakes. The finishing sander is only for tight geometry, corners, and detail cleanup.
Finishing sanders scratch easily
Orbitals do 95% of the work
Detail sanders = specialty tools
Finishing sanders are often misused
Use detail sanders only for corners
Final sanding is still done by hand
Understanding Finishing Sanders
Why finishing sanders, detail sanders, and orbitals get confused — and how knowing the difference saves you time, frustration, and the surface you’re trying to protect.
BY THE END OF THIS STORY
By the end of this story, you’ll know which sander does the hard work, which one is a specialty tool, and how to stop making the mistake almost every beginner makes.
Estimated read time: 5 minutes
Finishing Sander vs Orbital vs Detail — Quick Comparison
Finishing Sander — slow, scratch‑prone, specialty use
Orbital Sander — fast, clean, main tool
Detail Sander — corners, edges, tight geometry
Surface Quality — orbital wins
Beginner Mistake — buying a finishing sander first
Best First Sander — orbital
Quick Summary
Most beginners buy a finishing sander thinking it’s the main sanding tool, but it isn’t. Finishing sanders leave scratch patterns, cut slowly, and only shine in tight corners or awkward geometry. The orbital sander does nearly all the real work — fast cutting, clean surfaces, and predictable results — with hand sanding completing the final pass. Detail sanders are specialty tools used briefly and put away. Understanding which sander does what prevents ruined surfaces, wasted time, and the classic beginner mistake of relying on the wrong machine.
The Boring Truth About Sanding
If you’ve ever bought the wrong sander, don’t worry — everyone does it once. In the finishing world — painting, staining, clear coats — it doesn’t matter whether the material is metal, wood, or plastic. Sanding is always the preparation. I’ve done my share of it: autobody, drywall, wood, even plastic Revell model cars. No matter the job, one thing never changes — sanding is boring, but it’s vital for a good finish.
My First Power Sander
And like anyone who’s done boring work, I’ve always looked for shortcuts. That’s where power sanders come in. Everyone remembers their first cheap sander — the vibration, the noise, and the scratches you didn’t see until it was too late. The first one I ever used was a cheap plastic Black & Decker from the early 1980s — the kind that held a half sheet of sandpaper under two spring clips.
The Old Finishing Sander Problem
Those old sanders ran in tiny back‑and‑forth movements. They were noisy, and half the vibration went into the wood while the other half went straight up your arm. After thirty minutes your hands tingled and your ears rang. And they left a very noticeable scratch pattern that showed up the moment stain hit the wood — a lot like the cat walked by, shook itself, and left cat hair in the finish. I grew to hate that sander quickly — but it was my first experience with power sanding.
Where Detail Sanders Actually Fit
Today, anything is better than those primitive machines. Detail sanders still exist and every shop has at least one, but most people buying one don’t realize they’re specialty tools. They’re mainly used where an orbital can’t reach: tight corners, edges, frame‑and‑panel cabinet doors. They come with square pads or curved triangular pads, and they’re wonderful for cleaning out paint strippers and old finish from hard‑to‑reach areas.
Why the Orbital Does the Real Work
But the real sanding — the bulk of it — is done with the orbital sander. It cuts faster and leaves a far better surface. After using a finishing sander, the surface might look good, but the scratch pattern will show up in stain. So it’s good practice to do the final sanding by hand.
Detail Sanders vs Orbitals
A detail sander may look like an orbital sander, but they’re completely different tools with completely different jobs. If you’re buying your first sander, you don’t want a finishing sander. The orbital does ninety‑five percent of your sanding. The last five percent is hand sanding and whatever corner work the detail sander can reach. I’m not talking about belt sanders or drum sanders here — those are shaping tools. This is about the final sanding before finishing, not rough work.
My Combo Sander
Detail sanders are specialty tools, period. They’re used in combination with orbitals and hand sanding, not instead of them. My own finishing sander is a combo tool — I can switch it from orbital to finishing mode with a flick of a switch, and I can swap the pad from round to triangle. I paid a lot for it, and I really only use the orbital feature. The finishing mode is there, but it’s not part of my daily workflow. Once you understand what a detail sander can’t do, the orbital sander starts to make a lot more sense.
When You Actually Need a Detail Sander
A detail sander is something you buy when the need arises. You use it for that one job — usually a corner, an inside edge, or a tight spot on a frame‑and‑panel door — and then you put it away. It goes on a shelf along with the odd‑shaped sandpaper that fits it. And keep in mind, I do this for a living. I spend a lot of time in the shop, and I’m telling you: I rarely need it. So think about that if you’re considering getting one.
Detail Sander Strengths
• Inside corners — Gets into geometry a round orbital physically can’t reach.
• Tight recesses — Perfect for the little pockets in frame‑and‑panel doors, drawer fronts, and trim.
• Edge control — Cleans edges without rounding them over the way an orbital can if you’re not careful.
• Old finish cleanup — Removes stubborn varnish, paint, and stripper residue from carved or awkward areas.
• Glue squeeze‑out removal — Gets into corners and inside edges where dried glue hides. • Small parts — Useful for sanding tiny components or trim pieces that are too delicate for an orbital.
• Profile touch‑ups — Light cleanup on mouldings or decorative details without destroying the shape.
• Awkward angles — Works where hand sanding is possible but slow, cramped, or uncomfortable.
The Bottom Line
A detail sander earns its keep in corners, edges, and awkward geometry, but that’s where its job begins and ends. It’s a problem‑solver, not a main tool. Most of the time you reach for it, fix the one spot the orbital can’t touch, and put it away again. If you’re new to sanding, don’t mistake it for a general‑purpose machine — it isn’t. It’s a specialty tool you buy when you need it, use briefly, and then store until the next tight corner shows up. The orbital does the real work; the detail sander just helps finish the parts the orbital can’t reach. And after that I still go over it by hand.
If You’re Buying Your First Sander
The orbital is the workhorse. The detail sander is the helper. Knowing the difference is half the craft — and it’s the part most beginners miss.
Here’s the detail‑sander setup I use when geometry gets tight.
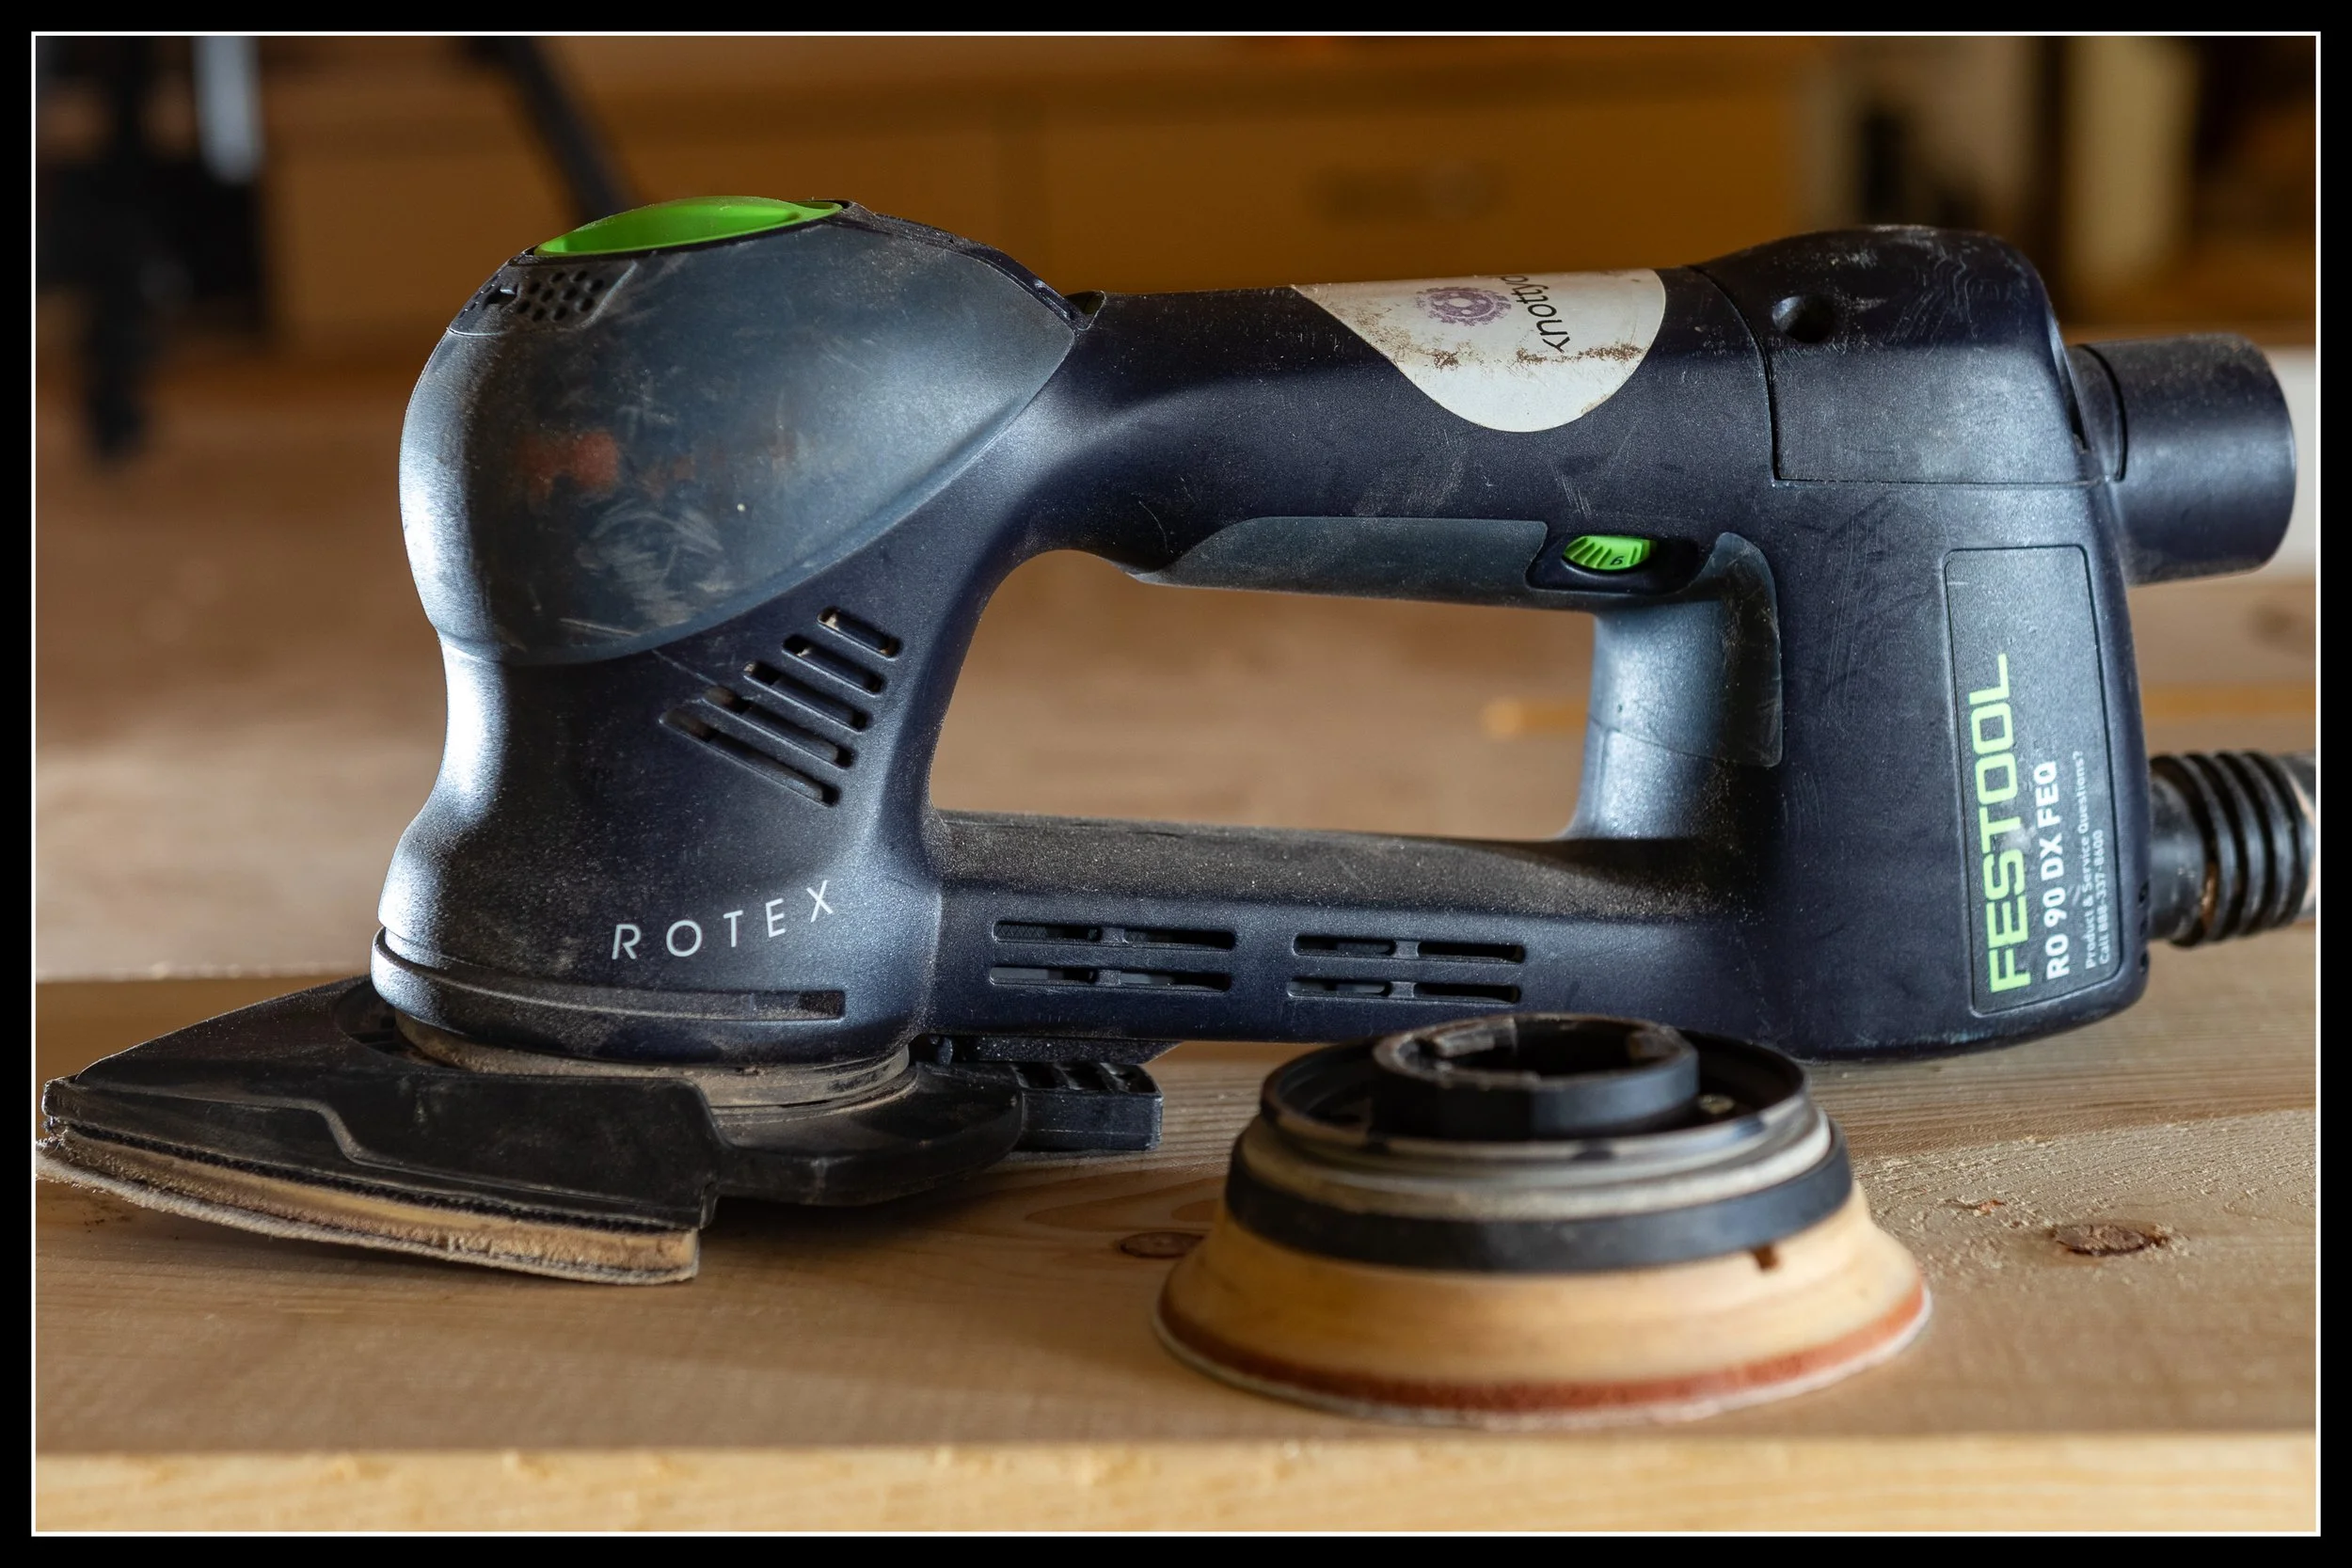
Festool RO 90 DX FEQ‑Plus — Detail Mode for Tight Geometry
The RO 90 set up as a detail sander — triangular pad installed, orbital pad sitting behind it. This is the mode built for corners, edges, and tight geometry, even though the tool spends most of its life in orbital mode. Small, controlled, and perfect for lathe work or any spot the round pad can’t reach.
Together, gathered in one place so the machine stories, tool reflections, and workflow moments stay connected — easy to find and easy to return to.
SHARE
The Working Side of the Craft — Connected Through Machines, Tools & Stories
If you want the stories shaped by table saws, bandsaws, grinders, fences, and jigs — the honest, noisy side of woodworking — the Working Side Of The Craft is one click away.
If you’d like to hear from me only when something big is happening — a launch, a milestone, or a major project — you can join the mailing list below.
Written by David Flather, Red Seal cabinetmaker and founder of Knotty Dave’s Fine Woodworking — a Manitoba shop rooted in heritage restoration, storytelling, and real craft.
All photos shot by David Flather — in the shop, on the road, and in the places where craft and story meet.
Related stories:
My First Bandsaw That Didn’t Suck — A Woodworker’s Journey Through Vintage Saws
Contractor Saw vs Cabinet Saw: The Real Difference I Learned the Hard Way
Oscillating Belt Sander Review — The Small‑Shop Workhorse Every Woodworker Eventually Needs
Belt Sanders: Why They Dig, Gouge & Ruin Surfaces When Used Wrong
The Workshop Library
If you enjoyed this story, there’s lots more like it inside The Workshop Library — and it’s free to explore.
Wood Archive — species, grain, working properties, and real‑world craft notes
Behind the Grain — the deeper stories inside wood, craft, and heritage
The Working Side of the Craft — tools, shop life, workflow, and the realities of making
Digital to Sawdust — Design Studio — geometry, proportion, visual flow, and design thinking
The Stories of the Shop — the personal side of craft, the shop’s history, and the quiet moments that shape the work
House & Hearth — heritage home restoration, the hearth room, winter culture, and the lived‑in side of craft
I’m just one man with a shop, building this archive one story at a time. If you’d like to follow the journey as it unfolds, explore The Workshop Library — new stories every week.
